Wednesday, November 4, 2015
Throwing
It's REALLY hard to get a sense of the motions of throwing in words and scattered pictures, so I made you all a video to look at instead. I apologize for the sub-par camera-work, but a first person camera angle seemed most helpful for anyone actually studying pottery. That meant a camera attached to my head. Oh boy. Click the link below to be transported to a magical world...
Video: Throwing Cereal Bowls on the Potters' Wheel
Tuesday, November 3, 2015
Pulling Handles
How to pull a handle off the body of a leather hard mug. This is another of those processes where a video is worth a thousand words, so here's a link to a youtube clip of handling a large coffee mug. Apologies for the whiny studio Stewart. He gets concerned for my mental health when I'm apparently talking to myself. Enjoy!
Video - Pulling Handles Pottery How-To
Video - Pulling Handles Pottery How-To
Thursday, July 31, 2014
Trimming
A fellow potter told me once that they hated trimming. They found it tedious. I LOVE trimming. I suppose throwing is a bit more dynamic, but I have a perfectionist streak, so trimming is one of my favorite things. I find it very meditative, and the state of the clay at that point of the process is delicious.
First step. Very important! Look shape of the inside of the bowl. Is the bottom flat? Curved? What is the shape of the curve? Half-circle? Parabola? Is there any extra fat in the walls near the base that should be removed? On a well-trimmed pot, the shape of the outside matches the shape of the inside, so that the walls are the same thickness all over, and the bottom is the same thickness all over. The foot ring is the only part that sticks out, and it is the same thickness again. This makes for a harmonious look, a piece of pottery that feels light, instead of clunky, and will make it much more likely to survive the stresses of final drying and firing without the dreaded s-crack. Clay shrinks as it dries, and then again during the bisque and the glaze firing. Thinner areas dry faster than thicker areas, so they shrink first, and the different shrinkage rates crack the clay. If you manage to make it to the firing, thinner areas heat and cool faster than thicker areas, which again, makes them shrink at a different rates, and again, causes cracks right down the center of the pot.
You also want to keep in mind your final glazing at this point in the process. If you are going to need to hold this pot upside-down by the foot to dip the rim in glaze when it's all done, you are going to need to plan out a foot ring that is tall enough for your fingers to get a good grip.
So take a good long look a the inside of your pot in comparison with the outside and plan whither thou shalt whittle. You can make a quick mark with your thumbnail on the bottom of the pot of where the foot ring will sit. You can make a mark on the side of a spot where you need to trim a bit of excess weight.

When clay is ready to be trimmed, it still has the rich, moist color of wet clay, but it is firm enough that curls of clay cut away smoothly, without stickiness. Something like cheddar cheese, or fudge. I use a dark claybody, rich with iron oxide, so the trimming stage feels like working with chocolate.
During the year that I had studio space at Feet of Clay, in Brookline, my workspace was right in their front plate glass window, among the pots of geraniums. Pots I threw in the morning would soak up the sun and be ready for trimming after lunch. Now, I work in a damp, cool basement, so it usually takes a few days for pots to dry enough to be trimmed. A day after throwing, the rims of small cereal bowls are firm enough that I can cut the pots off of their bats to finish drying upside down.

Any pot that is meant to have a trimmed foot is thrown with a bit of extra thickness at the bottom that will eventually become the foot. That extra thickness dries slower than the thinner rim and sides, so flipping the pot upside down as it dries exposes that wet bottom to the air and helps even out the drying process. It also helps keep the rims from warping. After a day in the stranded-turtle position, cereal bowls are ready for a trim.
Any pot that is meant to have a trimmed foot is thrown with a bit of extra thickness at the bottom that will eventually become the foot. That extra thickness dries slower than the thinner rim and sides, so flipping the pot upside down as it dries exposes that wet bottom to the air and helps even out the drying process. It also helps keep the rims from warping. After a day in the stranded-turtle position, cereal bowls are ready for a trim.
First step. Very important! Look shape of the inside of the bowl. Is the bottom flat? Curved? What is the shape of the curve? Half-circle? Parabola? Is there any extra fat in the walls near the base that should be removed? On a well-trimmed pot, the shape of the outside matches the shape of the inside, so that the walls are the same thickness all over, and the bottom is the same thickness all over. The foot ring is the only part that sticks out, and it is the same thickness again. This makes for a harmonious look, a piece of pottery that feels light, instead of clunky, and will make it much more likely to survive the stresses of final drying and firing without the dreaded s-crack. Clay shrinks as it dries, and then again during the bisque and the glaze firing. Thinner areas dry faster than thicker areas, so they shrink first, and the different shrinkage rates crack the clay. If you manage to make it to the firing, thinner areas heat and cool faster than thicker areas, which again, makes them shrink at a different rates, and again, causes cracks right down the center of the pot.
You also want to keep in mind your final glazing at this point in the process. If you are going to need to hold this pot upside-down by the foot to dip the rim in glaze when it's all done, you are going to need to plan out a foot ring that is tall enough for your fingers to get a good grip.
So take a good long look a the inside of your pot in comparison with the outside and plan whither thou shalt whittle. You can make a quick mark with your thumbnail on the bottom of the pot of where the foot ring will sit. You can make a mark on the side of a spot where you need to trim a bit of excess weight.
The bowl is placed upside down on the wheel. The wheel head has a series of concentric rings scribed into it that help me get the bowl back roughly on center. With the wheel spinning very slowly and my hands in a well-supported position, so I don't accidentally jiggle, I hold a needle tool against the side of the pot where the foot will be. As the wheel spins, the tool draws a dash on the side of the pot if it isn't entirely centered. The longer the dash, the closer to on center the pot is. I stop the wheel and move the bowl a squidge, then try again. When the tool draws a light circle all the way around the pot, I know I'm back on center. I roll out three quick coils of clay about an inch long and thick as my thumb and squash them onto the wheel head so that they hold the bowl steady for me. There is also a tool called the Giffin Grip that you can use to get your pot re-centered and immobilized, or you can use the "tap centering" technique, but I'm pretty speedy doing it this way, so that's what I do.

And then I trim. I like the small, cheap Kemper trim tools that come with beginner pottery tool sets, but find what works for you. Dolan tools have the advantage of being re-sharpenable, so you only have to buy them once, but then you have to be confident in your ability to sharpen them, and they are an expensive initial investment. There are Asian-style tools that look like the knives used to turn wood on a lathe. There are giant loop tools that let you confidently carve off great swathes of clay if you're a confident hacker roughing in the general shape on a giant bowl before getting more detailed, or want a rough, hacked look as a stylistic choice on your finished product. I like the precision of the little Kemper double-ended loop tools. One lasts me about 2 months before it's too dull and I throw it away. About once every six months I empty the tiny waste basket in the studio and it contains 3 loop tools and the melty cone packs from six months of firings. Six months of studio trash fits in a shoe-box. It's pretty cool.

Just like when you throw, when you trim you need to hold your hands in a supported position. Elbows tucked against your body, or propped on your knees. One hand supporting the other, so that you can make tiny, slow, adjustments to your hands without being thrown off by the force of the clay pressing back at you as the wheel turns. With the wheel running at a medium speed, mark the inside and outside of where the foot ring will go. Then find the angle to hold the trim tool to the pot so that it carves off a smooth, thin strip of clay. If you're someone who likes to peel an apple in one smooth, unbroken motion, you'll love this. Remembering what the inside of the bowl looked like, peel away excess clay, so that the foot ring is roughed in, and then slowly refined.

Beginning potters tend to be so worried about accidentally trimming all the way through the bottom of the pot that they actually don't trim enough. People can spend years pecking away hesitantly. My best advice is go big or go home. The only way to know how much is too much is to go ahead and trim right through a few pots. Trim through ten pots right at the beginning and you'll save yourself years of timidity and clunky thick pottery. As you trim, stop the wheel periodically, and give the bottom of the bowl a light tap with a finger, like thumping a drumhead. Listen to the quality of the sound it makes. With practice, you'll start to recognize the sound that says you're about to trim through the bottom, and the sound for "just right." Some potters like to push gently on the bottom of the pot. With experience, they can tell what amount of give to the surface means they are just right.

The foot of a pot is one of it's more distinguishing features. The "terminations" (rims and feet) are a big part of a potter's particular style. Take the time to make nice, crisp, definite ones. There's nothing sadder to me than a nice pot with a cruddy little foot. If it's straight up and down, make it really straight up and down. If it curves out, make it a clean, defined curve. If it curves in, make it a clean inward curve. Foot rings often have multiple curves and angles to them. You may need more than one tool to get the profile that you want, and your tools need to be sharp and clean to do the finishing touches. Foot rings can echo, in miniature, the larger profile of the pot. Or reverse it. Or contrast from it. A short, minimalist ring is hidden in the shadow of the finished piece, lending simplicity to its form. An extra-tall complex foot becomes the focal point of the piece.

Trimming roughs up the smooth surface of the clay. The more surface area of a finished pot touches the table, the more chance that some little grit in the clay scratches the table. If you want the look of a wide foot ring, consider angling it ever so slightly off of the horizontal, so that only its inner or outer-most edge will actually touch the table. You can also use a shammy to smooth a foot ring the same way you use it to smooth a rim. I like to use a flexible metal rib to smooth the grain of the clay back down on the side of the pot and inside the foot ring after trimming.
And then I trim. I like the small, cheap Kemper trim tools that come with beginner pottery tool sets, but find what works for you. Dolan tools have the advantage of being re-sharpenable, so you only have to buy them once, but then you have to be confident in your ability to sharpen them, and they are an expensive initial investment. There are Asian-style tools that look like the knives used to turn wood on a lathe. There are giant loop tools that let you confidently carve off great swathes of clay if you're a confident hacker roughing in the general shape on a giant bowl before getting more detailed, or want a rough, hacked look as a stylistic choice on your finished product. I like the precision of the little Kemper double-ended loop tools. One lasts me about 2 months before it's too dull and I throw it away. About once every six months I empty the tiny waste basket in the studio and it contains 3 loop tools and the melty cone packs from six months of firings. Six months of studio trash fits in a shoe-box. It's pretty cool.
Just like when you throw, when you trim you need to hold your hands in a supported position. Elbows tucked against your body, or propped on your knees. One hand supporting the other, so that you can make tiny, slow, adjustments to your hands without being thrown off by the force of the clay pressing back at you as the wheel turns. With the wheel running at a medium speed, mark the inside and outside of where the foot ring will go. Then find the angle to hold the trim tool to the pot so that it carves off a smooth, thin strip of clay. If you're someone who likes to peel an apple in one smooth, unbroken motion, you'll love this. Remembering what the inside of the bowl looked like, peel away excess clay, so that the foot ring is roughed in, and then slowly refined.
Beginning potters tend to be so worried about accidentally trimming all the way through the bottom of the pot that they actually don't trim enough. People can spend years pecking away hesitantly. My best advice is go big or go home. The only way to know how much is too much is to go ahead and trim right through a few pots. Trim through ten pots right at the beginning and you'll save yourself years of timidity and clunky thick pottery. As you trim, stop the wheel periodically, and give the bottom of the bowl a light tap with a finger, like thumping a drumhead. Listen to the quality of the sound it makes. With practice, you'll start to recognize the sound that says you're about to trim through the bottom, and the sound for "just right." Some potters like to push gently on the bottom of the pot. With experience, they can tell what amount of give to the surface means they are just right.
The foot of a pot is one of it's more distinguishing features. The "terminations" (rims and feet) are a big part of a potter's particular style. Take the time to make nice, crisp, definite ones. There's nothing sadder to me than a nice pot with a cruddy little foot. If it's straight up and down, make it really straight up and down. If it curves out, make it a clean, defined curve. If it curves in, make it a clean inward curve. Foot rings often have multiple curves and angles to them. You may need more than one tool to get the profile that you want, and your tools need to be sharp and clean to do the finishing touches. Foot rings can echo, in miniature, the larger profile of the pot. Or reverse it. Or contrast from it. A short, minimalist ring is hidden in the shadow of the finished piece, lending simplicity to its form. An extra-tall complex foot becomes the focal point of the piece.
Trimming roughs up the smooth surface of the clay. The more surface area of a finished pot touches the table, the more chance that some little grit in the clay scratches the table. If you want the look of a wide foot ring, consider angling it ever so slightly off of the horizontal, so that only its inner or outer-most edge will actually touch the table. You can also use a shammy to smooth a foot ring the same way you use it to smooth a rim. I like to use a flexible metal rib to smooth the grain of the clay back down on the side of the pot and inside the foot ring after trimming.
Monday, February 17, 2014
Mixing Glazes
Glaze Chemistry 101…
Do you remember high school chemistry lab? The mad scientist thrill of measuring and mixing and heating? The whiff of danger implied by all the safety protocols, the eye wash station, and the emergency shower with its giant red handle? The smug knowledge that you were no longer a member of the "do not play with matches" segment of society. No, now you were being graded on your ability to finely tune your bunsen burner. Did you feel like you were being initiated into a secret society, where you learned the most fundamental truths of the matter that makes up our universe? It was a little bit magical, wasn't it?
Mucking about with chemistry is one of the more interesting parts of being a potter. Chemistry is the how and the why behind glazes and clays and firings.
There are all types of potters, who focus on all sorts of different parts of the process. Because there is so much to learn, in many pottery cultures, there is a history of specialization, similar to a modern factory system. Groups of potters work together for one studio, allowing each person to master a particular branch of knowledge, or one particular step in the pottery process. One craftsperson may do nothing but throw teacups, while another is in charge of the production of large storage jars. Someone else may never handle the wet clay at all, but do all the glazing. Yet another person may spend their time loading and firing the kilns, learning to tame the fire. The results are spectacular. With each person free to concentrate on just one thing, each person masters their particular contribution and the joint effort is beyond anything any one of them could have done alone.
But the potters working in cooperative studios, tirelessly mastering one aspect of their craft, tend to be forgotten by history, or actively disregarded as mindless drones. We are tempted to look past them for the man behind the curtain. No, but who is the artist? From our contemporary worldview, we are in love with the idea of some genius with a grand vision directing the show. Really we should know better. All the wonderful Renaissance painters ran workshops full of apprentices and contracted out different parts of the process. There were drapery painting experts, background landscape experts, people to prepare your pigments, your plaster, your scaffolding… And most of the achievements of our current scientific age are based on cooperative systems, with thousands and thousands of people, each contributing one tiny part to the whole, without ever understanding how the other parts work exactly. I can pay a doctor to fix me, he can pay a lab to run my blood-work, the lab can pay a supplier to compound the chemicals they need for my cholesterol test… And this is without getting into the elegant examples of complex systems built of simple parts in the natural world. Such stunning complexity from a few simple rules of physics. Such elaborate ecosystems built up as species evolve to exploit the available niches in their local environment.
Maybe it's because we are assailed by a constant bombardment of evidence to the contrary, that we love the idea of the solitary genius who does it all. We know how unlikely such a creature is to exist, so when we think we may have found one, we long to believe. The modern "studio potter" movement celebrates the potter as an artist and an individual. That's great, because it recognizes talent that would have gone un-sung in other contexts. That's not great, because it discourages the cooperation which leads to really sterling work. It also encourages artists to pursue individuality at the expense of quality, craftsmanship, and understandable content. And there is a real backlash against contemporary art as a result. In the clamor to say something revolutionary, a lot of artists, potters among them, end up saying nothing at all.
But, that said, potters are the most cooperative group in the art world. There are just too many variables that go into making a piece of pottery for anyone to be an expert in all things. So we share glaze recipes. We share techniques. It's the only way any of us get anywhere.
With that as background, on to mixing glazes…
There are a few ways to approach glazes. Some potters chose to spend the bulk of their time on other parts of the process. They buy powdered glazes premixed. Like cake mix. Just add water. You can also buy small amounts of liquid glaze in jars, ready to go. For people with a really time intensive decorating technique, who need lots of different colors in very small amounts, this is usually a good way to go. Other potters get into the mixing of glazes, but they work from established recipes. There are tons of books of glaze recipes out there, and potters all swap personal recipes back and forth as well. Other potters are attracted to the science of glaze chemistry. The science may be what got them into pottery in the first place, or they may be trying to achieve a very particular effect, for which no one has developed a glaze, or trying to recreate a historical technique, for which the recipe is lost. So they read, they mix, they test. They read, they mix, they test. Their forms are necessarily more simple, to leave them time to pursue the chemistry of the glazes.
Like all good little chemists, potters weigh their ingredients, rather than measuring by volume. If you want to mix your own glazes you will need to invest in an accurate scale. I use a three-beam balance, accurate to .05 grams. As long as gravity keeps working, so will my balance. No batteries to replace and no need to update the software every 3 months. It just works.
The ingredients of a glaze are at once very simple, and very complex. For starters a typical glaze needs some sort of "glass former" to make it glassy and water-tight. This may make it shiny, or it may not. Glass doesn't have to be shiny. There are a ton of variables at work here. The tricky part is getting the glass to stick to the pottery. Powdered glaze ingredients are mixed with water to make a liquid glaze to apply to the pottery. The glaze firing melts the glaze into a smooth glassy coat, but the melting glaze wants to run right off the pot. So we also need…
A "stiffener." We need something to slow that running down and help the glaze bond to the surface of the pottery.
And speaking of the pottery, here is the really tricky part… each clay body formula has it's own specific firing needs and the glaze needs to match. It's as if you were going to bake a cake and you had bake the icing in the oven with the cake at the same time. The cake and the icing need to bake at the same temperature and both need to come out done and delicious at exactly the same time. Whoa. So each glaze needs a certain amount of "flux," which alters the melting point of the glaze to match the firing needs of the clay. But wait, we aren't done yet…
Because clay and glaze expand and shrink as they heat and cool. When the glaze is in a liquid state, during the hottest part of the firing, the challenge is to keep it on the pot, but as things cool down again, the glaze re-solidifies. It needs an appropriate "coefficient of expansion" for the clay of the pot. If the clay shrinks more than the glaze as it cools, the glaze doesn't fit tightly to the surface of the pot and it can "shiver" off in razor sharp flakes. It looks smooth on the surface, but the glaze layer is actually sort of floating above the pottery. Any strong pressure can crack the glaze off in a big sheet. This can happen weeks or months later, leaving someone with a little glass shard hiding in their Rice Krispies. On the other hand, if the glaze shrinks more than the clay as it cools, the piece will have "crazing," a network of tiny cracks in the glaze. This is not nearly so dangerous as shivering. When a piece of pottery crazes, the glaze itself is crackled, but it is still firmly bonded to the clay of the pottery. Little pieces aren't likely to come off. Some glazes are intentionally developed to be crazed, as a decorative effect. The famous rabbit-patterned "Dedham Pottery" for instance.
Having sorted all that out, now we might want to decide a few aesthetics. We can make our glaze more or less translucent or completely opaque. We can change the color. We can make it grow great big crystals like snowflakes. We can make it have speckles. We can design it to run artfully down the pot a little bit, or to stay absolutely where we put it so that we can paint detailed designs and they won't smear during the firing. We can make it slick and smooth, or crusty like lichen.
And the really tricky part… is that the ingredients we use never just affect one quality of the glaze, they usually affect several at once. If I add a powdered clay to my glaze, it will contain silica, which is a glass former, AND alumina, which is a stiffener. Many clays also contain iron oxide, which changes the color, but what color you get depends on how the iron interacts with other ingredients in the glaze and how you fire it. Iron oxide is also a flux, so it will affect the melting point of my glaze. And depending on my firing conditions, the iron can make my glaze translucent and shiny, or opaque and satiny. Occasionally it even grows little crystals like snowflakes. So many variables, in just one glaze ingredient! Balancing a complete glaze formula becomes very tricky.
And the really, really tricky part… is that we are working with natural ingredients that are dug out of the ground and often vary slightly from batch to batch. There are all sorts of trace elements that come along for the ride with my ingredients. I can get a chemical formula for something, and use that as a starting point for creating a glaze recipe, but I will have to do some testing to fine tune the recipe, because each bag of flint, or wood ash, or gerstley borate is slightly different from the formula printed on the label.
Okay, so that's kind-of-sort-of how you think about formulating a glaze, but how do you actually prepare one?
Step one, weigh out your assorted powdered ingredients according to your formula. In the photo below you can see the ingredients for what will become five gallons of teal glossy glaze. It takes about two and a half gallons of solid ingredients to make that amount of glaze. Almost all of that is dry powdered clay, in this case, EPK or Edgar Plastic Kaolin; and silica, our glaze former, finely ground natural glass. There is a also a bit of talc (the same stuff in baby powder and stinky shoe powder.), and some frit, a commercially produced flux that melts at a specific temperature. The handful of brown you see is rutile, and oxide of titanium and iron that gives the glaze a nice speckled effect. At the very top of the bucket you can see the tiniest amount of pink: cobalt to give us blue. And green: copper to give us green. We are talking about a tablespoon of colorant to turn an entire bucket of glaze blue or green. Whoa! Science! I also throw in a handful of epson salts, (magnesium sulfate), as a deflocculant, to help keep the other ingredients suspended in the glaze. Without a deflocculant all those heavy clays tend to cake at the bottom of the bucket in an un-stirrable mass. With a deflocculant you just have to stir madly every five seconds. Without one you need a jackhammer.
Speaking of which… Certain glaze ingredients have a bad tendency to clump into gluey unsinkable lumps if they go into the glaze all by themselves, so, wearing a proper industrial respirator (a paper dust mask is NOT GOOD ENOUGH!), and working with a good ventilation system or outside, stir your dry ingredients. This is going to make a lot of dust, and finely powdered glaze ingredients are not something anyone should be breathing. Kick the dog out of the studio if you are doing this indoors, even with the ventilation running. I knew a dog with silicosis, and it was scary. If she got excited and started to run around, she couldn't get enough air and would collapse and pass out. We all tried very hard to never get her excited. Silicosis is the black lung of potters. You don't want it. Stir gently but thoroughly until your dry ingredients are completely mixed.
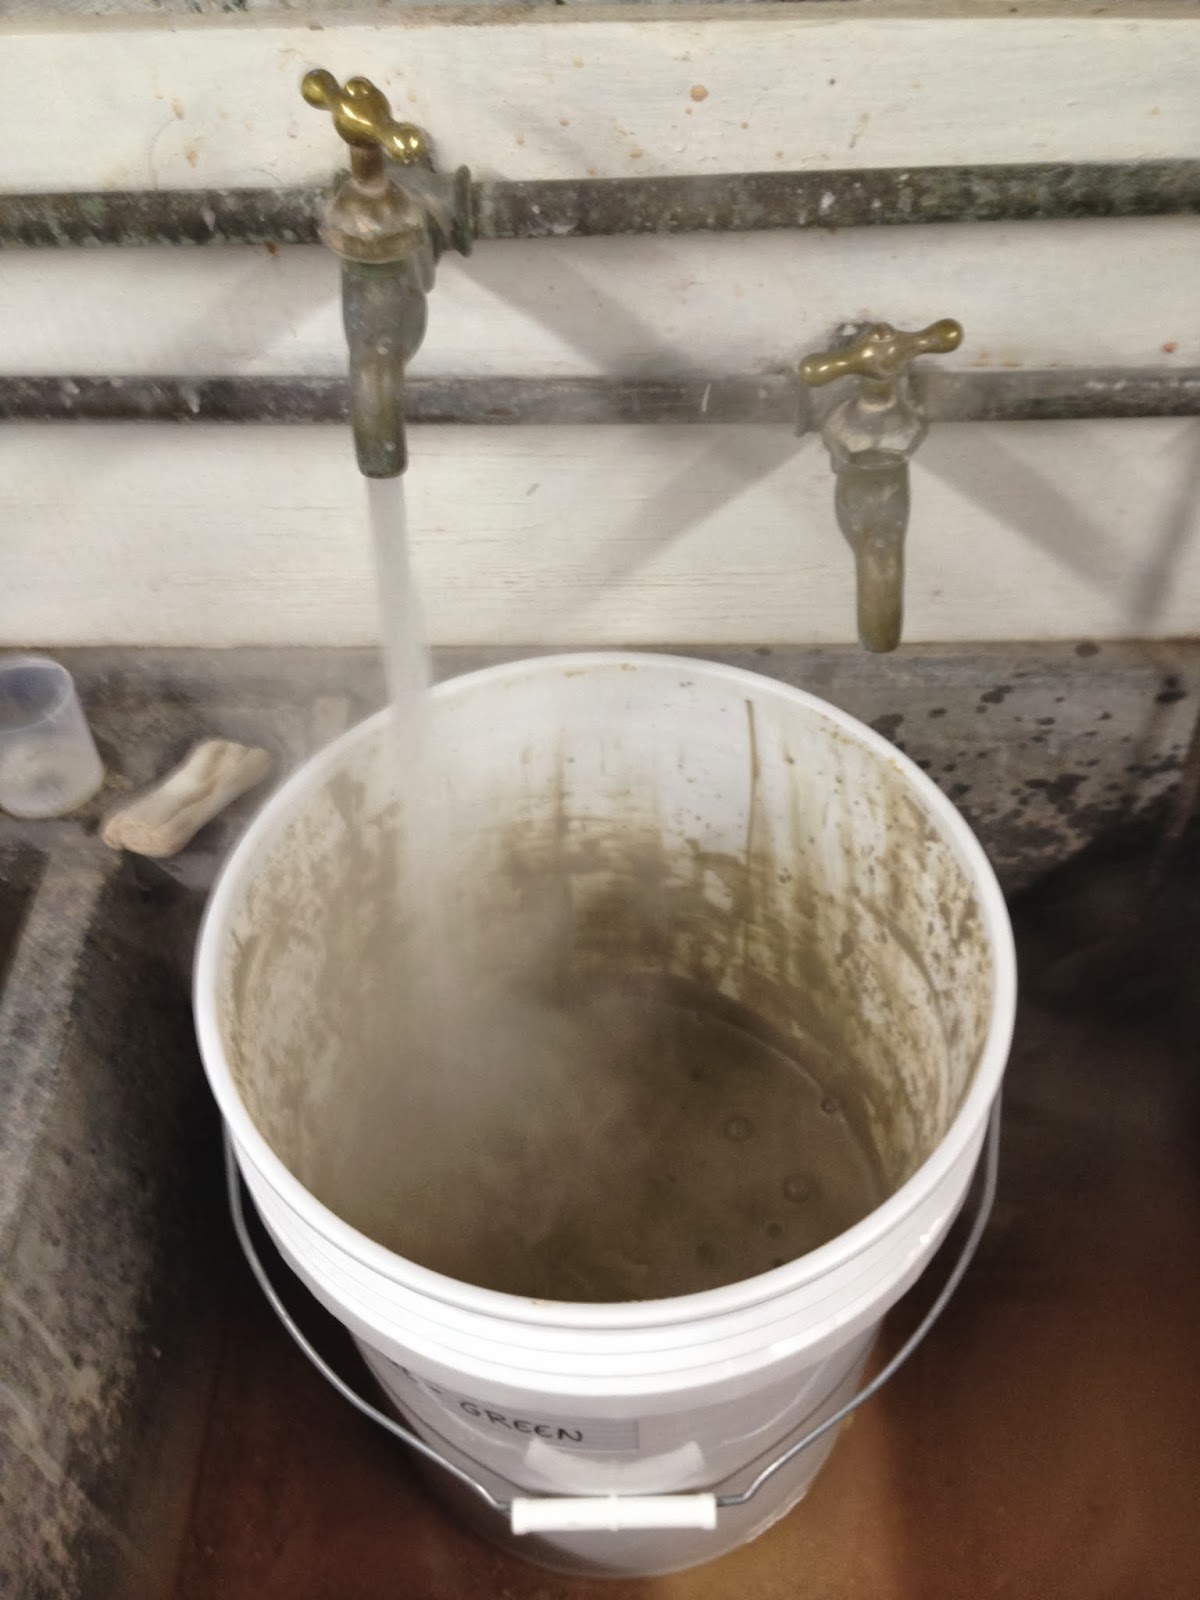
If you are mixing a brand new bucket of glaze, partially fill a clean bucket with hot water. If you are just topping off your supply of an old glaze, add some hot water to the existing glaze bucket. How much water you will need depends on how much glaze you are making. You can always add more water if your glaze is too thick, but the only way to take it out is to leave your bucket open and wait for evaporation. Err on the side of too thick. Start with a bare minimum of water.


If you are mixing a brand new bucket of glaze, partially fill a clean bucket with hot water. If you are just topping off your supply of an old glaze, add some hot water to the existing glaze bucket. How much water you will need depends on how much glaze you are making. You can always add more water if your glaze is too thick, but the only way to take it out is to leave your bucket open and wait for evaporation. Err on the side of too thick. Start with a bare minimum of water.
Slowly add your premixed powders to your bucket of hot water or existing glaze. As when mixing plaster, always add powder to water, never water to powder. That keeps lumps to a minimum. This is going to kick up a lot of dust, no matter how carefully you do it, so wear your respirator and have the ventilation system running or work outside. Add a little powder. Stir. Add a little powder. Stir… Take your time to break up the biggest softball-sized lumps as you go. It will save you headaches in the long run. If you get impatient, you'll end up with a bucket full of water with one giant iceberg of glaze ingredients floating in it that refuses to break apart or sink.
Once you have dispatched the worst of the lumps and incorporated all your powder into your liquid, you need to get the whole thing mixed to an absolutely smooth consistency. There are all sorts of blunging attachments you can put on your power drill to beat out the smaller lumps. (To blunge. The word of the day!) Some folks use an old kitchen blender, or an immersion blender (stick blender). The kind you put right into the pot to turn that pot full of veggies into a fine cream of broccoli soup. You can pass the whole bucket of glaze through a graduated set of finer and finer sieves. (Takes forEVER, but some people like it.) My personal favorite tool for the job is the Talisman glaze sieve. It looks like this:
You put it over an empty bucket, pour your sloppy glaze in, and turn the big handle on top. A series of little brushes swish all the glaze, lumps and all, through a screen at the bottom. You can sieve a five gallon bucket of glaze five times in five minutes. Admittedly, it does take a little effort to take it apart and clean the brushes out carefully, so you don't have cross contamination of ingredients between glaze batches, but the time you save in sieving makes it completely worthwhile.
Once you're all nicely sieved, be sure your bucket and it's lid are both carefully labeled. Most glazes don't resemble their eventual color at all, so careful labeling is important. If you work in a group studio, it's a good idea to put your name and the date on the bucket as well, in case anyone has a question for you. Save the notes you made while measuring out your ingredients so that you can look back at them if something doesn't turn out as expected. Make sure all your math is on that piece of paper. Even the really easy math. Make sure you check off ingredients as you add them in case you are interrupted in the middle of measuring. Be sure you make a note anytime you are opening a new bag of an ingredient in particular, since ingredients may vary from batch to batch. Glaze ingredients are expensive, so careful notes may mean you can figure out what went wrong with a batch and fix the problem.
Add a bit more water to your glaze if necessary. Most glazes will be best thinned to the consistency of heavy cream, but it depends on the glaze and the application technique.
I like to let any newly mixed glaze sit for a day or two before using them on any pots. Some of the ingredients take time to absorb all the water they can hold, and this can affect how smoothly your glaze application goes. Some ingredients may go into solution with a little time, or chemically combine with other ingredients. Who knows what the heck is going on in that bucket? All kinds of fun stuff! Give it a day or two to settle down before you start glazing with it. The most interesting and extreme examples of this are soda glazes. They are strongly basic, and quite chemically active in the bucket. So much so that you can do wonderful experiments. Mix a batch of glaze. Glaze a teapot. Wait a day. Glaze another teapot. Wait another day. Glaze another teapot. They will all look slightly different when they come out of the kiln. How long the glaze sits on the pot before you fire it also makes a difference for soda glazes. Most glazes, however, just need a day to really soak themselves after mixing, and then are stable. You may need to add a little more water a few days after mixing.
Thursday, January 9, 2014
The Glazing Process
This is how I glaze to get a two-toned pot. One color glaze on the inside, and a different color on the outside. Some of this applies to glazing anything. Some of it is specific to my clay and glazes, and the particular effect I want to achieve.

First I wash all the bisqued pots down with clean water and a sponge. Any clay dust or greasy fingerprints can keep the glaze from adhering tightly to the pottery during application. They act as a resist to the glaze. You won't necessarily know there is a problem until after the glaze firing. During the firing, the glaze melts and moves over the surface of the pots. Dust and dirt encourage the glaze to run right off, instead of creating a good bond to the clay, leaving little bare fingerprints, or creating large, uneven surfaces where clay dust settled onto the bisque before glazing. Be very wary of using lotion on your hands on glazing days. (Sorry, I know pottering means chapped hands. If you're just dying, try to get the backs of your hands greased without getting any on your fingers.) It's important to keep a very clean studio for this reason, as well. I glaze and store my bisque in a separate room from the rest of the studio to cut down on dust problems.

Glaze is made of finely ground minerals mixed with water. The powdered sand, metallic oxides, and clays that compose a glaze all settle quickly over time and clump together at the bottom of the bucket. It is critically important to remix your glaze thoroughly each time you glaze a batch of pots.
Before each glazing session, I pour my glazes through a dedicated kitchen sieve into clean five-gallon buckets, scraping down the sides well with a spatula. That breaks up any lumps and remixes the glaze. Then I stir vigorously, seconds before each dip or pour. The glaze needs to be a completely even consistency from the top of the bucket to the bottom before each dip, or you will not get an even coat of glaze on your pots, and some glaze ingredients settle VERY quickly. Stir in between every pot.
For my glazes, something the consistency of heavy cream is just right for a perfectly glazed pot, but every glaze is different. It's important to know your glazes well, so that you can add a little extra water to the bucket as necessary each time you glaze. Water evaporates from stored glazes over time, particularly in a hot studio, but knowing how much water to add to make up for this loss is a question of experience. Because they have different ingredients, some glazes will need to be thicker, or thinner, to give you a perfect coat. Depending on how you are applying or overlapping them, you may also need a thicker or a thinner batch.
One of the most common problems for beginning pottery students is a tendency to use too many glazes. Instead of getting to know three or four glazes well, they want to use twenty, and they don't generally take good notes about their experiments. The results range from the mildly disappointing: ugly pots; to the disastrous and expensive: damaged kilns and ruined kiln furniture. Ever wonder why I can't make you that mug shape you like, but in purple? This is a big part of the reason. It's impossible to guarantee good results unless you know your glazes REALLY well. I've developed a few that I like, and I stick to them.

Next I pour a generous amount of glaze into the inside of the piece with a small pitcher, and carefully swirl the liquid to coat the entire inside. This must be done quickly to get an even coat, and takes a steady hand. Interestingly, leaving glaze sitting in a piece for too long before you pour it out can cause some really weird problems. The porous clay soaks up water from the glaze. That's what initially gets the glaze to stick. If you work too slowly, the clay will soak up as much water as it can hold, and then, being sopping wet, the minerals that actually make the glaze do it's thing won't stick evenly. It's like trying to wipe up a spill with a sopping wet sponge. Nothing sticks to the sponge, it just smears around. So work quickly.

I quickly pour the excess glaze out of the pot, and hold it upside down until the last drips fall off the rim. I don't want any extra drips to run back into the inside when I turn the pot right-side-up again, or they will spoil my nice even coat of glaze. Once the inside coat has dried enough to permit safe handling, I use a damp sponge to clean any drips off the outside of the pot and the rim.
I let the outside of my pots dry until I can't see where I sponged it clean. This can take several hours, so I usually glaze the insides of all the pots, sponge them, eat lunch, and then dip the outsides, starting with the pot I glazed first. It's important to be sure that the pot is evenly dry before dipping the outsides. Remember, when you apply a glaze, it only sticks because the bisqued pottery is porous. It soaks up the water from the glaze like a sponge and leaves a film of powdery minerals high and dry on the outside of the pot. If your bisque is already wet when you dip it, because you just sponged off some drips, those wet spots won't be able to absorb any more water, and you will get a slightly thinner glaze coat in those areas. If you accidentally drop a pot into a bucket of glaze, and need to clean it off completely and start over, (yep, it happens), you will probably need to let the cleaned piece dry overnight before you can start again. The thinner the walls of the pot, the longer the drying time. Thick pots are thirsty. Thin pots sip their glaze delicately.
There is one exception to this rule. Pieces that have a trimmed foot. Because of the way that trimming roughs up the clay particles, a trimmed area will absorb water and glaze differently than an untrimmed area. This can lead to little pinholes in the glaze on the trimmed feet and bases of your pottery. Some potters paint a layer of slip or terra sigillata over their feet just after trimming and give it a quick burnish to seal the surface back down. I'm not quite that persnickety. If my pottery is the right consistency for trimming, I can give it a quick burnish without the extra slip step, and then run a damp sponge over that section just before I dip the outside of the pot. For my clay, that does a good enough job of evening out the absorption rate of the clay and eliminates about 90% of the pinholes.

Dipping the outside of a pot can be a bit tricky. You need to find a way to hold it that doesn't get your fingers in the way. I hold small mugs by stuffing my whole hand inside and spreading my fingers. It lets me dip all the way up to the rim. Bowls with inward-curving rims can be held with two hands, just on the inside of the bowl, and also dipped all the way up to the rim.
Bowls with rims that curve out, however, require a few fingers on the outside of the rim to hold them, so you need to plan for this from the start when you are thinking about what you want your finished piece to look like. Either that first outside-of-the-bowl dip won't go all the way to the rim, or you will leave some fingerprints, and will need to plan for a way to cover them up later with a design element. You can also use specially made dipping tongs to hold a piece while you dip it, but they also leave a small, but visible, mark in the glaze of the finished piece, and can crack a large piece with a thin rim. The best solution depends a bit on the glaze and a bit on the pot. It's a good idea to plan your glaze design in advance to minimize or cover up fingerprints or tong marks. Some glazes are forgiving enough that you can touch them up with a paintbrush, and any marks will disappear completely during the firing. Other glazes are not so kind and you will need to put a polka-dot, a flower, a stripe, or something on that spot or it is going to draw the eye like that particularly horrible zit you had at the prom.


Next, I clean the bottom of the pot with a clean, damp sponge. When the pot is fired, any part of it that will touch the shelf it sits on in the kiln has to be completely free of glaze. Otherwise the glaze will permanently glue the pot to the kiln shelf. Glazes are liquid during the firing, but create such a tight bond as they cool down from the firing, the only way to remove a stuck pot is a hammer, and there is a great risk of ruining an expensive shelf.
Rinse your sponge frequently, and squeeze all the water out of it. It needs to be damp, but not dripping, or you'll make a smeary mess. You want to be able to remove glaze from the foot ring of your pot in a nice crisp line. That's one of the things that separates a great pot from a ho-hum one.
It takes a good sponge to do this. I like the big yellow grouting sponges that contractors use for grouting the tile in your bathroom. They have very fine, even holes. I cut them up with scissors to a manageable size, and throw them away as soon as they start to become ragged.
If you know your glaze well and you know your pottery forms well, you know exactly how much the glaze is going to run down the pot during the firing. Wipe back the glaze just as much as you need to, but no more. An extra ridge on your foot ring can help catch glaze drips, allowing you to glaze further down the foot. A properly balanced glaze will be docile and predictable.
Look at the commercially produced dishes in your kitchen. Do they have giant unglazed feet that scratch your table? Do they have drips with kiln wash stuck to them where a pot almost glued itself to the kiln? I doubt it. This is one of the things factory-made pottery gets right. There is no reason you can't too. The things that separate your work from commercial work should all be good things. They should be the things that you can do as an individual with thumbs, which they can't do with machines on a conveyor belt. You aren't working in a mold, so you can make complex forms with lots of curves in and out, and without visible seams. You can do complicated, multi-step glaze applications. But the factory should never beat you on craftsmanship! If their pots have neat little feet, yours should too. Think about these sorts of issues as soon as you start throwing a pot or testing a new glaze recipe.
This is one reason I often say no to special requests for particular pots. I can't predict how my glazes will run down a novel form and I can't predict how a new glaze will run at all. I evolve my forms slowly over the years and take lots of notes. I repeat forms over and over and over. Knowledge is the key to good craftsmanship and repetition is the source of that knowledge. If you want to constantly branch out in new and exciting directions, be a painter. Paint mainly stays where you put it. There are too many unpredictable variables in pottery to be a dynamo. If you want to be a potter, get disciplined and plod stodgily towards genius.

Finally, I dip the rims of the pots. Small pieces can be held easily by the foot, but large pieces can present a challenge. Again, it's important to plan ahead. When you are throwing and trimming large pieces, you can save yourself a lot of heartache later if you be sure to create a foot that will be easy to hold for dipping.

And voila! About 8 hours later, your load of two-toned pots will be all glazed and ready for the kiln...
Wednesday, January 8, 2014
Loading and Firing the Kiln
When I worked for The Potters Shop, I was intrigued by a video in the library there. It was about 30 minutes long and solely dedicated to the topic of loading an electric kiln. "My gosh," I thought. "What untapped secrets have I been missing all these years? I'm going to learn some expert tips!" Five minutes later, the coffee had perked and I sat down to edify myself. The secret I learned? That there really are no secrets. Loading an electric kiln is about as straightforward as you can get.
But, that is reassuring to know for sure, which is why such a video exists. Because kilns are scary! They can burn you. (Done it.) They can actually catch you on fire. (I have seen that, although it hasn't happened to me personally... yet.) They are held together by a sheet metal jacket that can cut you right down to the bone if you aren't being careful. (I do that quite frequently.) They are incredibly fragile. So fragile that you can pick the bricks comprising them apart with your fingernail. (Please don't be tempted to try that if you ever visit my studio. Those things are a pain in the patoot to replace.) Their electrical elements are also incredibly fragile. The kilns themselves are very expensive, as are replacement parts, which you are expected to be able replace yourself as part of routine maintenance about once a year, or the kiln will stop working entirely. Eek! But we potters put up with all of those challenges, because electric kilns are so easy to load and fire.
We actually take our kiln technology a bit for granted these days. It was kiln technology that gave the East the monopoly on porcelain production for hundreds of years after its development. Europe hadn't figured out how to make a kiln capable of firing at the high temperatures necessary for porcelain and the rich copper red, and translucent celadon green glazes that went along with it. The technique for making porcelain was such a valuable trade secret that alchemists traveling the courts of Europe used to claim, not only that they could make gold from lead, but also that they could make porcelain. There is a fabulous history of the introduction of porcelain to Europe called "The Arcanum," for those who are interested.
Long story short: current kiln technology is amazing! And here's how it works…

An electric kiln is pretty much a giant toaster oven. It is made up of specialized soft firebricks. I call them "air brick" to distinguish them from the hard type of firebrick used in your fireplace and in some other types of kilns. Some people call them "soft brick." As I understand it, air brick is made from clay with a lot of combustible material mixed in. When the bricks are fired at the factory, in their kilns, (kilns from kilns!) all the combustibles burn out, leaving a brick that is full of tiny holes, with the density and fragility of a sugar cube, which you can cut easily with a hacksaw. Ceramic is a great insulator to start with, but when you add all those holes to the mix too, you get a truly amazing material. The inside of my kiln can withstand temperatures of 2381 degrees Fahrenheit. Three inches of air brick is all that separates you and me from a quarter of the temperature of the surface of the sun. And yet, the outside of the kiln only gets to about 200 degrees. Hot enough for a drop of water to hiss if it hits the side of the kiln and hot enough to burn you, but still, how remarkable is that?
The heat comes from electric coils that wind their way along grooves in the bricks all the way up the interior sides of the kiln. Some kilns have more coils, also known as "elements," in the floor, or inside the lid. The elements are very brittle at room temperature, particularly after their first firing, so installing them initially is a bit nerve-wracking, and doing repairs if they pop out of their element grooves and dangle into the interior of the kiln is even worse. And dangle they do, if you didn't put them in properly! They expand and contract during the heating and cooling of the kiln and can escape to touch the liquid surface of a hot pot and burn themselves out. Oops. Time to replace that one! $100 down the drain and there goes my afternoon… Generally kilns need all their elements working properly to be able to achieve glaze temperatures, so if a single element breaks during a glaze firing, you may lose the entire kiln-load of pots.
Which begs the question, "how do you know what's going on in there anyway?"

Tool number one: cone packs. Pyrometric cones are made of clay that is specially formulated to melt at a precise point. Different cones melt at different points, so if you line them up in order of melt, you can peer in at them during a firing and see how far you have progressed.
The cones are all exactly the same shape and size, and the bottoms are cut at a slight angle, so that they sit leaning forward a little bit. This encourages them to bend in a graceful and predictable arc as they begin to soften. If the firing continues much past the softening stage, they will melt into a complete puddle and potentially run all over the floor, shelves, and pots in your kiln. Big mess.
I have three cones in my cone packs for a glaze firing, but just one for a bisque firing, since that needs much less precise monitoring. They stand up neatly, all adjusted to the exact same angle, with their bases pressed into a little finger of soft clay. A little extra clay at the front of the cone pack with a little fingerprint dimple in it keeps the first cone from touching (and sticking to) my kiln shelves during the firing. After six to eight hours of a glaze firing, the first cone will soften and melt to tell me that my kiln is nearly finished and I had best start checking on it every 10 minutes or so. For my clay and glazes, this is cone 4. The second cone is cone five. That one will soften and bend in a curve like a birch tree with a young Robert Frost swinging from it. When the tip of the cone touches the pad of clay holding it, I can say that my firing has "attained cone 5." It doesn't count until the tip touches. For my clay and glazes, getting to cone 5 means, really, pay attention now! Could be five minutes, could just be two, until you need to turn the kiln off… The last cone, cone 6, is the "guard cone." It is there to let me know if I have gone too far. For my clay and glazes, cone 6 should be just beginning to soften when I turn off the kiln. It should look like a tree swaying slightly in the wind, but not like one blowing in a hurricane. I have a little chart of "degrees of cone bend" taped to the wall next to the kiln and for each firing I record exactly what the degree of bend is on that last cone, so I can compare one firing to the next. I like cone 6 to have 20 to 30 degrees of bend. If I worked in porcelain, I might fire to cone 9 or 10. If I worked in earthenware, might fire to cone 3. It all depends on the clay and glazes you use.
You may have noticed that I haven't talked about temperature during this discussion of cones. That's because cones don't measure temperature. They measure heat work. Heat work takes time into account, as well as temperature. Think of cookies. You don't just bake them at 350 degrees. You bake them at 350 for 10 minutes. It's about the time at 350, not just the temperature. And depending on how big your "rounded teaspoons" are, and how many cookies you put on the pan, and how thick your cookie sheets are, and what material they are made of, and how cold the cookie dough was when you started, it may take 10 minutes, or it may take 15. If your oven runs a little on the cool side, maybe you are actually baking at 300 degrees instead of 350. The cookies will still get done, but they will need a little longer. With cookies, you can turn on the oven light and peek in at them to see if they are done. With a kiln raging away at 2000 degrees, you don't exactly want to open the lid to check on things. You'd lose your eyebrows. So there are small "peep holes" at intervals in the side of the kiln, just big enough for you to see a row of cones. The peep holes are closed with "peep hole plugs," or "peeps" for short, to keep the heat in. These are made of, you guessed it, more clay!

What you care about is not time, or temperature, but the relationship of the two as it relates to the specific mass of clay that you happen to be firing. How golden brown are these 12 cookies after 10 minutes? Since it's a complex relationship, with the temperature changing over the course of the firing, and it is hard to measure temperature really accurately at such extreme ranges anyway, it's easiest to put something in the kiln that will melt after a certain amount of heat work, and peer in at that. A cone pack.

It is possible to take the temperature of a kiln, however. Special high temperature thermometers called "pyrometers" can be used. I don't like to depend on them to make any important decisions, since, again, it's the heat work that you really care about, but there are certain types of glazes that require more complicated firings schedules where keeping tabs on the temperature can be helpful. Crystalline glazes are heated and cooled at very specific rates during different periods of the firing to achieve big snowflake-like crystals growing in the glaze. There just isn't room for enough cones in a cone pack for all the adjustments you need to make for those. Potters who work with crystalline glazes may use cone packs for the most important transitions in the firing, and do the math for temperature and time for the others. The advent of computerized kilns has greatly simplified this.
Some potters also "crash cool" their kilns, either to achieve a certain effect with their glazes, or just to get the kiln unloaded and ready to use again faster. They pull one or more peeps out, or even prop the lid of the kiln open, while their kiln is cooling. This is a tricky process however. Different clays and glazes, and the bricks of the kiln itself, all expand and contract at different rates at different temperatures as they heat and cool. It's possible to crack your pots if you cool them too quickly using this technique. It's also possible to crack your kiln bricks or shorten the life of the coils. Potters who do this are very experienced and are working with familiar glazes. There are certain temperatures at which they can crash cool for a while, and other temperatures at which they need to have the peeps and lid closed to prevent the pots from cracking as they pass through quartz inversion. These potters keep pyrometers in their kilns during cooling and watch like a hawks.

The other way to know what's going on in your kiln is to keep an eye on the kiln "atmosphere." As your kiln heats, it will begin to glow, first a dull red, then cherry red, then orange, then yellow, and finally white hot. The color correlates with an exact temperature. With experience you can pull a peep, peer into the kiln, and know what the temperature is. Since the cones only start to fall during the last hour of what may be an eight-hour firing, I keep a chart of color vs. temperature next to the kiln so I can know how I am progressing. It helps me spot problems quickly. If the bottom and middle sections of the kiln are glowing bright yellow, and the top is still only dull red, that is a tip-off that I may have blown out a coil and should stop the firing before I waste any more electricity. It also lets me know whether I have time for a leisurely lunch upstairs in the kitchen, or I will need to run back down to the studio every five minutes to check for falling cones. This kiln has attained cone 08, which means my bisque is ready to turn off. I can see my bent cone through the peep and the bright orangey-yellow atmosphere is just what I expect for this temperature.

The last way to know what is going on in your kiln is a good kiln log and experience with consistent firings in your kiln. There are a number of variables that determine how long a kiln will take, but the more of them you control for, and the better records you keep, the better you can predict what will happen in your next firing.
Because I take good notes, I know that my kiln will finish faster if I start it at 6:00 a.m. than if I start it at 8:00 a.m., because voltage available through the power lines actually varies over the course of a day. The way our power grid is set up in this country there are slight brown outs during times of peak demand. Most customers will never notice, but if you run a kiln you will see the decrease in available power as a slightly slower firing rate during peak demand hours.
Every kiln has a sweet spot, an ideal set-up. Take notes on every aspect of your firing so that you can determine the best running conditions for your particular kiln. And then keep taking notes, so that you will notice changes over time that indicate a failing coil or relay, a change in the voltage available from your electricity provider, or changes in the quality of your materials. Relying on your gut intuition and memory may lead to decent firings eventually, but you'll achieve consistent results much faster if you have thorough notes to look back on that allow you to isolate for a particular variable when you have a question. Be a good little scientist. Don't trust what you think you know. Trust the data. I know I need a taller shelf at the bottom of the kiln for optimal heat circulation, but how tall? What happened last time I tried a 10 inch shelf there? In a kiln that was packed to the brim? On a 90 degree day in June? With good notes from last June, I can answer that question pretty exactly.
So, that was a ton of background information, but how do you actually load an electric kiln?
Kilns are loaded with sets of ceramic posts separating sets of ceramic shelves that hold the pots. The walls in a house are built to transfer weight directly to the foundation. In the same way, an initial short set of posts are located precisely over the kiln's foundation: the metal kiln stand that holds it off the floor. This first set of stilts is usually a half inch, or an inch tall, serving to lift the bottom shelf off of the kiln's delicate floor.
Most kilns can use either whole shelves, which are round, octagonal or ten-sided, and fill an entire layer of space, or half shelves, which split the shelf along its diameter and allow you to stagger shelves if you have pieces of different heights. I almost never use half shelves, because the shape means they tend to sag in the middle after a few firings, and since I'm a production potter, I make a LOT of pots. I always have a whole shelf's worth of pots the same height, so there's no need for half shelves. Whole shelves do warp a little bit, but not nearly so badly.
Whatever kind of shelves you use, it is important to flip them regularly to help minimize warping. Firing a large platter on a warped shelf can mean a warped or cracked platter. I fire my bisques with the shelves kilnwash-side down, since kiln wash isn't necessary for a bisque. I also use shelves that are rated for cone 10 firings, even though I only fire to cone 5.3. Good shelves are expensive, but even the cheapest ones are rather pricey, so buy what you really need from the start and you won't have to pay to replace them. They'll outlast the kiln itself if you take care of them.
Each shelf, whole or half, is supported by three stilts. Ever go to a restaurant where your table rocked and you had to wedge a sugar packet under one leg to even it out? I bet it had 4 legs. Unless everything is perfectly level, four-legged tables rock. Three-legged tables don't. Neither do three-stilted shelves. For each shelf, the three stilts supporting it must line up exactly with the three stilts supporting the shelf below so that weight transfers evenly down through the stilts to the kiln stand and the floor. At the high temperatures of a glaze firing, if a stilt isn't lined up with the one beneath, it can warp the shelf it's on pretty badly.

It's very important to consider heat circulation through the kiln when loading to assure an even firing. Remember that heat rises, so if you had no shelves or pottery at all in the kiln, you might expect the top of the kiln to be a little hotter than the bottom, with currents of hot air moving through the kiln producing additional hot and cool areas. Once you put in shelves and pots, though, you change the natural convection pattern of the air in the larger space. If you think about this from the start, you can adjust your firing set up to even out the temperature from top to bottom, so that all shelves in the kiln heat evenly. Since the bottom of the kiln will naturally be cooler, you want the bottom shelf to have tall stilts on it creating a large, open space with several rows of kiln elements heating that area directly. I like a 9 or 10 inch shelf on the bottom section of my particular kiln for my particular firings, but this varies from kiln to kiln, so you will need to experiment and take notes.

Shelves, stilts, and pots not only block convection, they also soak up heat energy. The greater the mass of pottery and kiln furniture you have in a load, the more energy it will take to reach your desired cone, and the longer your firing will be. Let's say you had a big order of plates to fire and decided to pack a kiln with as many shelves as it would physically hold to fire all those plates at once. Say a shelf, a three-inch stilt, a shelf, a three-inch stilt… all the way to the top of the kiln. You would be wonderfully efficient in your use of space, but the kiln would never make it to glaze temperature. All those thick shelves would soak up heat energy as fast as the coils in the kiln could pump it out. You can get away with that sort of thing for a bisque, but not at stoneware or porcelain glazing temperature.
For a bisque firing, pots can be stacked on top of each other, foot to foot, foot to rim, or rim to rim to save space, but they should always be stacked in such a manner that the weight at the top transfers evenly to the pots at the bottom, or you risk cracking and warping. I like to place the largest pots first and then work my way down to the smallest for each shelf, to be sure I fit things as efficiently as possible.
Nothing should ever hang over the edge of a shelf. That's an invitation to warping for bisqued pots and glazed pots alike. It's just too hot right next to the elements in the walls. Putting pots right on the edge of a shelf is fine, but leave the gap between the shelf and the wall of the kiln clear for air circulation.
There's always room in the next kiln load if something didn't fit this time.
I turn all handles to face the middle of the kiln for a bisque. Handle joints are likely places for a mug to still be slightly damp. If there is a little trapped moisture there, it will turn to steam as the kiln heats and explode the handle off of the pot in a spectacular fashion. If the handle is turned inward, it's less likely to send little chips of clay flying into all the element grooves.
Beginning students spend a lot of time worrying about trapped air bubbles causing explosions in their work. In my experience, most exploded beginner pots are actually wetness blow-ups, because beginner work is often thick, and unevenly so. What seems to be a completely dry pot is actually only dry on the walls; the inch-thick bottom is hiding moisture. You can tell a wetness explosion by its truly spectacular nature. One little air bubble may cause one little *pop!* and then, the air having escaped, no more problem. A wet section in a pot however is usually distributed throughout a large volume of clay. It goes !!!BOOM!!! and scatters pieces of clay shrapnel onto every shelf, into every pot, knocks handles off of other pots… You get the idea.
If a chip of exploded clay lodges in an element groove, it will melt there and burn out the element during the next glaze firing. Picking these chips out with tweezers, vacuuming them out, taking the kiln apart entirely to be sure you got all the pieces… all of these options are a royal pain and if you miss just one little shard you'll have ruined your next firing. Best not to fire anything that could possibly be damp, and turn handles inward just in case. The feet of pots always dry slower than the rims, so I turn everything upside down while it dries, and also in the bisque, to give the pots as much air circulation as possible. This also has the benefit of preventing warping.
For a glaze firing, all pots need to be right-side up, since the glazed rims would cement the pieces down to the kiln shelves. Nothing can touch anything else, or it will be stuck together permanently. Because glazes expand and bubble a bit during the firing, it's good to leave a bit more space between pots than seems strictly necessary. I like to be sure I could put a finger between two any two pots at their closest point just in case.
A layer of kiln-wash made up of clay, alumina hydrate, and silica sticks to the shelves just enough to stay put, but not so much that it won't flake off easily. In the case of a minor glaze drip, you can scrape off the kiln wash, drip and all, before the next firing. Any kiln wash that falls into a glazed pot on a shelf below will leave a permanent chalky flake in the finish, so it's important to keep it well away from the edges of shelves and to handle the shelves carefully. The whole point of the stuff is that it flakes easily, so it's easy to knock a little chip loose.

As I load the kiln, I place cone packs where I will be able to see them easily through each of the peep holes. Sometimes this means propping a cone pack up on a short stilt to get it even with the level of the peep. In addition to the cone packs, which tell me when it is time to switch off the power, many kilns also have backup devices that will turn the kiln off for you. Always use these solely as a backup. Your brain knows more about the appropriate time to turn off a glaze firing than these mechanical or computerized aids, and they need frequent recalibration to stay accurate. On the other hand, in case something goes horribly wrong, it's good to have a backup for safety's sake. My kiln has two mechanical backup switches.
The first is a kiln sitter. This is a mechanical switch operating on the principles of the lever. A little baby-sized cone, just like the ones in my cone packs is placed in between a set of prongs inside the kiln. This cone should always be one cone higher than the cone I actually want, so it doesn't accidentally turn my kiln off too early. Remember, I want to trust my brain to make the decision of when to turn off the kiln. The quality of my results depends on getting that decision just right. Since for my firings, I want cone 5.3 or thereabouts, so I put a cone 6 in the kiln sitter. If I am not paying attention, and my kiln over-fires, at least it will only be by a little bit. Some of the pots may be salvageable. If that cone melts, it drops a lever, which releases a weighted tab, which swings smartly down and clicks the off button on the kiln's control box. Cute eh? Just like a game of mousetrap. Except, having only two moving parts, it works dependably every time. But because I'm dealing with temperatures of over 2000 degrees, there is also a backup to the backup. Can't be too careful!

The second backup is a limit timer. Basically an egg timer that turns off the power for me. I set it for 15 hours at the start of every firing. My firings never take 15 hours, but if I were lying unconscious on the floor and unable to turn off the kiln myself, and the kiln sitter also failed, after 15 hours the timer would click the kiln off before it had a chance to burn the house down around me. The pots would likely be a runny mess by then, but still. Nice for my peace of mind.

Okay, I lied. There's a third safety backup. It's a checklist and a stiff set of studio protocols. There are mechanical failures, and then there are human failures. I'm undoubtedly the weakest link in the chain. The most likely cause of error is me, not my equipment. So, just like airline pilots, I'm not allowed to work when I'm tired. I have strict personal rules about when I am allowed to load kilns and when I am allowed to fire them. I don't break the rules. Even to get a final order done. Even during the busy season when I don't get a single day off for three months straight. I'm allowed to glaze pots when I'm tired. I'm allowed to throw pots when I'm tired. But loading a kiln when I'm tired is a great way to get the kiln sitter set incorrectly, or forget to include a cone pack. By the time I reach the loading and firing steps of the process I have invested about 40 hours of work in a kiln load. I can't afford to screw up. So I go to bed and finish loading early in the morning.
And doing certain steps of the pottery process is just plain dangerous when you are tired. I can't afford to take time off from throwing because I have sliced my hand open, pulled my back, or given myself a nasty burn during loading or firing. Best not to do those jobs when you are at any less than your best. It saves money and time in the long run.
A checklist next to the kiln has saved me on countless occasions from missing an important safety step when starting the kiln. You are never too smart for a good checklist. The smart only look smart because they accept their own fallibility and put systems in place to compensate. I always check and double check the list before I walk away. It is placed between me and the way out of the studio, so I can't walk upstairs for a cup of coffee without noticing it. Did I open the windows to allow fresh air in and prevent carbon monoxide build-up? Is the ventilation fan on to suck fumes out? Is the house heat off to avoid accidentally sucking fumes into my living room if the ventilation system should happen to fail? Is the limit timer set properly? Is the kiln sitter set properly? Did I close all the peeps back up? Have I left anything flammable anywhere near the kiln?
My kiln is in my studio, which is in the basement of my house. There is a good argument to be made for having the kiln in a separate kiln shed, all on its own, like the separate kitchen buildings of ye olden days. There is less exposure to kiln fumes. And if the worst should happen, and there is a fire, it is less likely to take out your home and studio. But it is easiest for a situation like that to occur when you aren't paying good attention to your kiln. Forgetting to check on a kiln is astonishingly easy when it's not right in front of you, and a fire can spread very quickly. I have plentiful carbon monoxide detectors, smoke alarms, and fire extinguishers in case of the worst, a good ventilation system, and three exits from my studio, but most importantly, I have me, right there, with the kiln directly visible from my seat at the potter's wheel, ready to stop a problem before it gets out of hand. If you are building a new kiln room, I strongly recommend a glass door and windows into the kiln room that allow you a clear line of sight to your kiln from anywhere in your studio as an important safety precaution.

So, we're loaded, we turn on the button and set the timer. We check the checklist and turn on the ventilation. It gets hot in there. We watch for 6 to 8 hours. We turn it off when the cones are just right. And then… we wait. The kiln cools slowly for the next 12 hours or so. It's important not to rush to open it, or again, you can crack your pots. That's another reason I stick to a strict firing protocol. If I always start the kiln at 6:00 a.m., it will be ready to open by 6:00 a.m. the next morning. I'm not tempted to open it early. It will still be glowing red hot when I go to bed and I'm not likely to abandon my pillow at 2:00 in the morning to go unload. The schedule saves me from my own curiosity.
Subscribe to:
Posts (Atom)